Amazon S3 has very cheap pricing model and a huge bandwidth that makes it perfect for serving static web sites. I will try to summarize what I have done here because it is the 4th time I have doing the same thing and I still need to go over a few different tutorials. I will also show how to change name servers for your domain for Bluehost and Godaddy.
Here a brief overview of what will do:
- Jekyll: For generating our static web site.
- Feeling Responsive: Jekyll theme we will be using. You can choose a different theme from here.
- Forklif: We will create a MacOS X app to upload changed files to S3. You can use any program you like but you will definitely need one.
- Markdown PRO: Markdown editor we will be using to edit our pages and blog posts. Any text editor is ok but Markdown PRO has live preview capability.
Creating S3 Buckets
Login to your Amazon Management Console for bucket creation. Select S3 service and create two buckets for you website. For example if your web site name will be www.mywebsite.com, create buckets as mywebsite.com and www.mywebsite.com. You can leave Region option as default but if you can guess you can select a location closer to your potential customers for slightly more faster response time.
Open properties of mywebsite.com, we need to change 2 settings there.
First, expand “Static Website Hosting” and select “Enable Website Hosting”. Enter “index.html” for “Index Document”. You can leave “Error Document” option as empty but you can use any page as error page just be sure that you actually create that page. Do not forget to save

Seconds, expand “Permissions” tab and click on “Add Bucket Policy” and enter the following, do not forget to change mywebsite.com to your own bucket name.
[code language=”javascript”]{
"Version": "2012-10-17",
"Statement": [
{
"Sid": "AddPerm",
"Effect": "Allow",
"Principal": "*",
"Action": "s3:GetObject",
“Resource": "arn:aws:s3:::mywebsite.com/*"
}
]
}[/code]
Save bucket policy.
Open properties of www.mywebsite.com, we will just forward this bucket to our mywebsite.com.
Expand “Static Website Hosting” and select “Redirect all requests to another host name” and save. Thats all for this bucket.

We have done with S3 settings. Now we need to setup name server side of things in both Route 53 and our domain name registerer.
Creating Route 53 Records
Open Route 53 Management Console and select “Hosted Zones” and than “Create Hosted Zone”. Do not enter www part, just enter mywebsite.com. You can leave comment section empty. Press “Create” button to create the zone record.

It will create two record sets, one for name servers with type “NS” and a “SOA” record. You will need name server names while you are changing name servers for your domain later, so write them down or better leave the tab open.
Press “Create Record Set” button to create a new record. Select Type A and Alias. Click on Alias Target and select your S3 Endpoint from the combobox. Leave others as default and press “Create”.
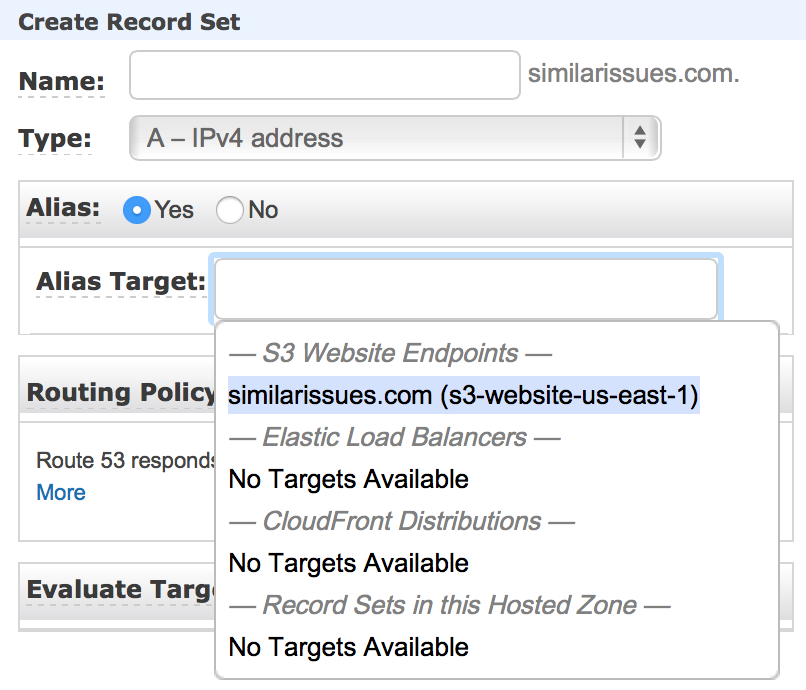
Add one more record. This time, write “www” to Name field and select Alias Target that points to www.mywebsite.com. After that you should have 4 record sets as shown in following screenshot. Of course name servers for your domain may be different.
Changing Bluehost Name Servers
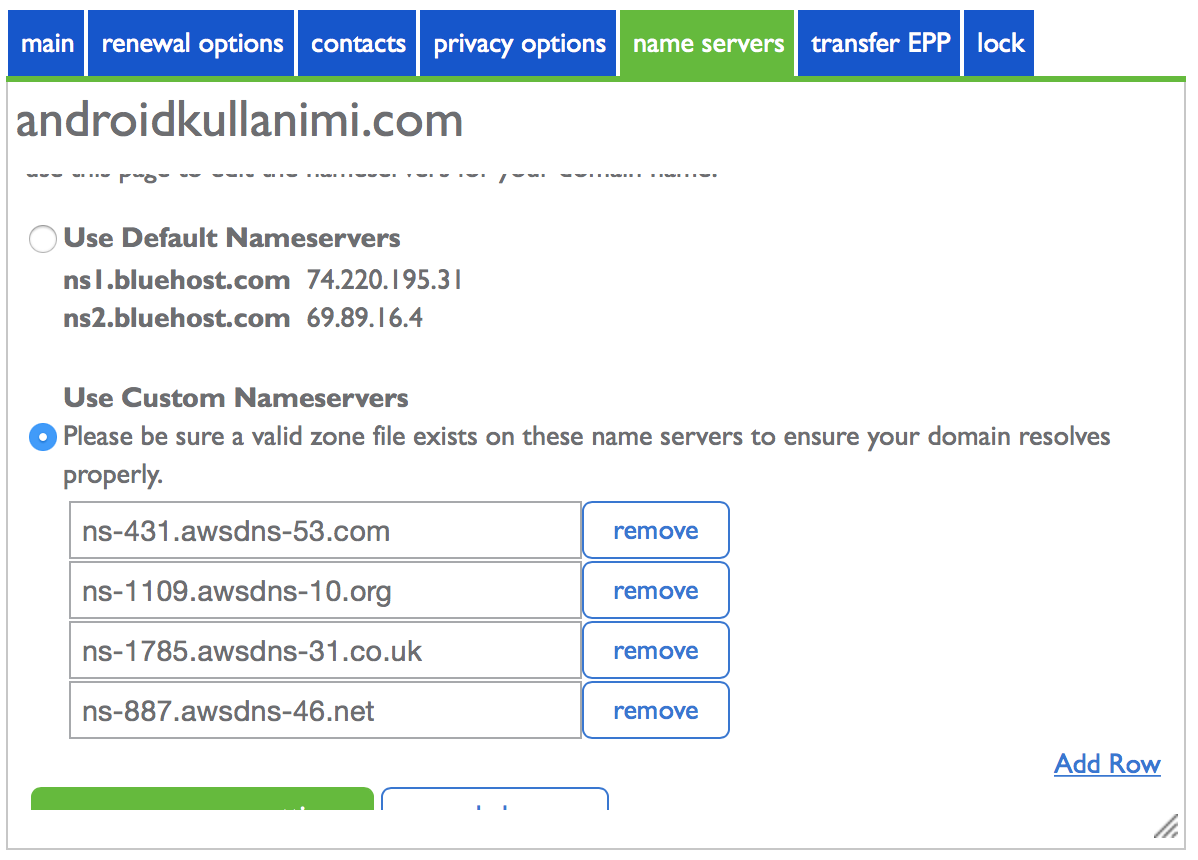
Login to your Bluehost account and open “Domains” tab. Select the domain name you like to manage and select “Name Servers” tab from right. Enter the Amazon Route 53 name servers you have noted above.
It may take several hours for new settings to be applicable.
Changing GoDaddy Name Servers
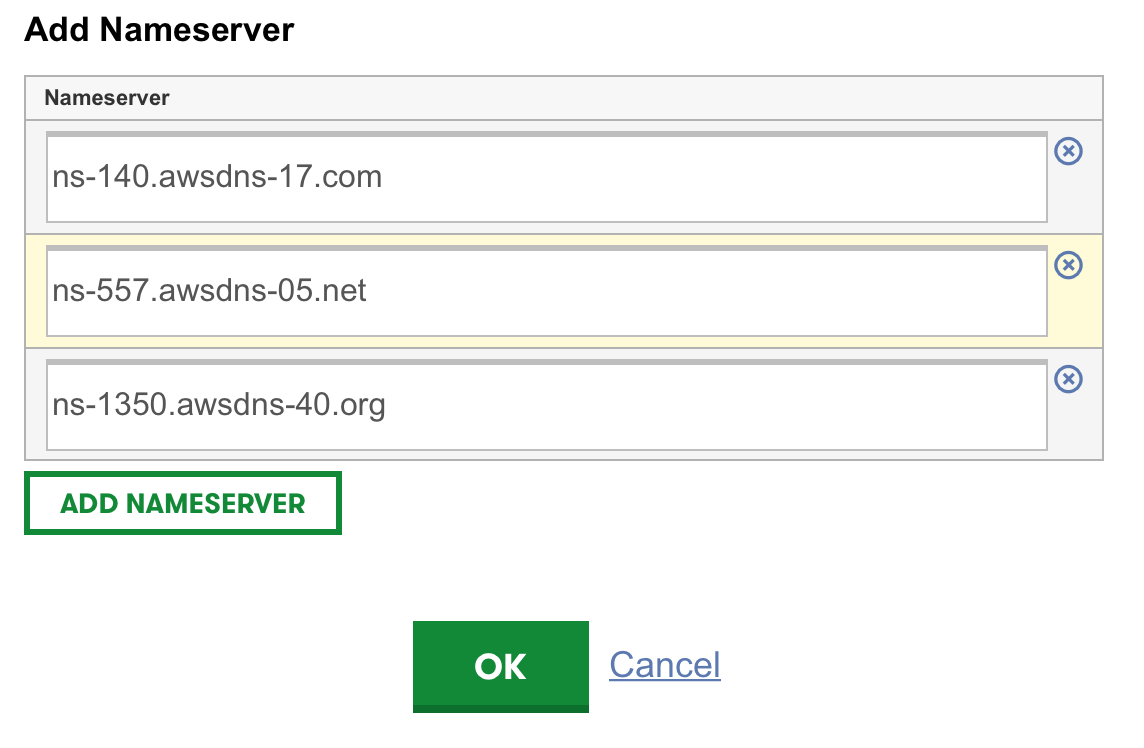
Login to your Godaddy account. Under “Products” expand “Domains” and click on “Manage” next to domain name you like to manage.
Under Settings, Nameservers click on “manage” link. This will open a page where your can enter name servers from Route 53. Select “Custom” and enter 4 name servers displayed in Route 53 panel.
After that refresh the page and new name servers should be displayed in the page. It may take several hours for new settings to be applicable.
Synchronizing Files with Amazon S3
Open Forklif application and add a new connection for your S3 account:

Open your local “_site” folder and Amazon S3 remote folder side by side.
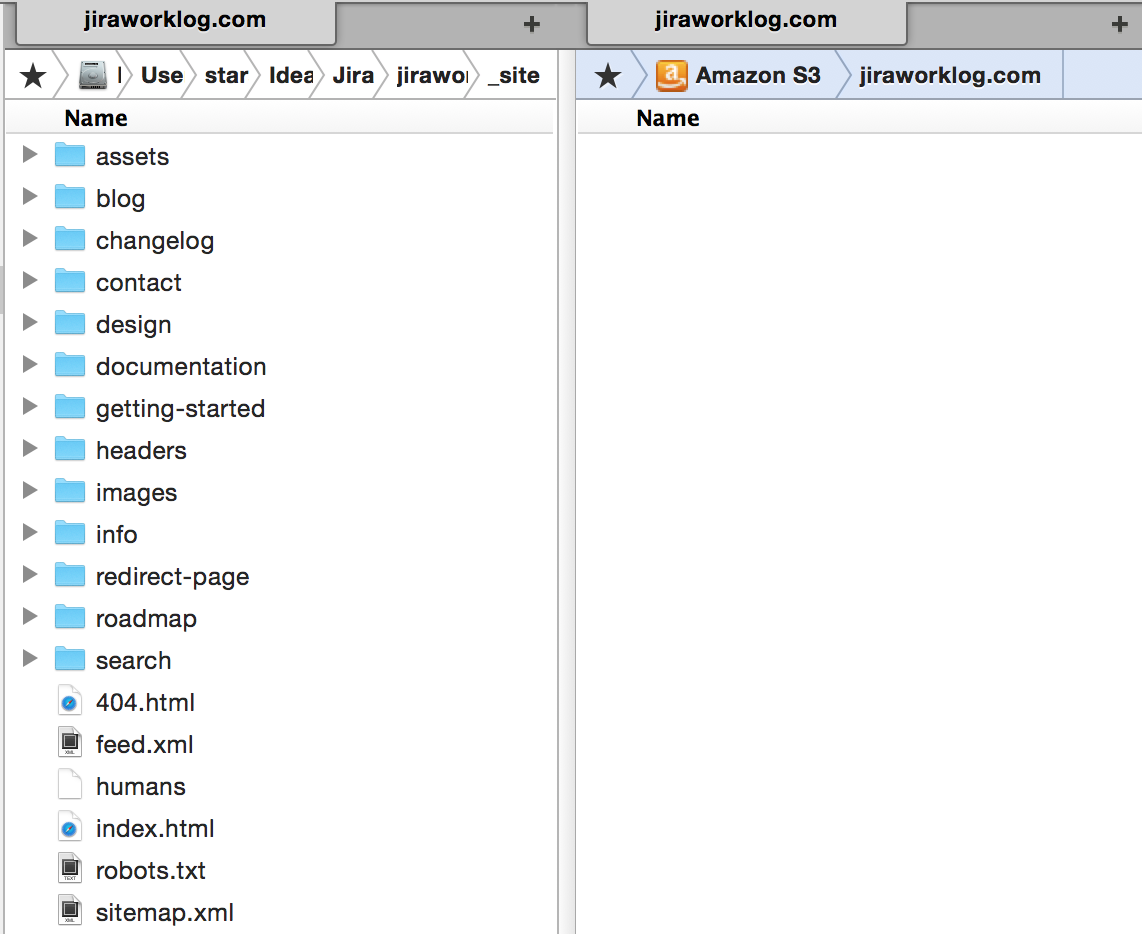
Click inside the tab showing your local files and select File->Sync to…. This will open synchronization window:

For the first synchronization you can exclude filter. In later synchronizations you can exclude .css, js files because they are a part of theme and will not change. There is an option that allows you to exclude non-changed files but in my case it did not worked reliably. Jekyll may be modifying the update date of files at every run. Unless you have a huge site non of these are actually an issue.
Chose “Save as Synclet” option because you will need to run it every time you add a new post or make a change on your site. Give it any name you want and save it under “Applications” folder. You can open it like any other MacOS X application. It will automatically detect files to be synched and upload all of them to S3 bucket.